Detailed setup definitely helps tone

So on my Epiphone Les Paul I recently noticed some buzzing on the A string when I was playing on higher frets. That got me looking at things to figure out why so I could figure out what to do about it.

A long straightedge helped me chase the problem to too much upbow in the neck so I needed to set the relief. I already had the correct wrench to adjust my truss rod since Epiphone so kindly uses a 4mm hex that I already have. But I ordered some feeler gauges so I could make sure I got it where it needed to be. And also a gauge for checking action and pickup height and all that (which also works as a fret rocker when I need one of those).

Those finally came today, so I set to work with my electric guitar. Interestingly, when I first started turning the truss rod, it was like it had never been done. The bolt turned freely for a turn or so before it started to catch and actually make any difference.

Being that I have never done any of this setup stuff myself before I spent hours at it, mostly looking stuff up. I feel a bit ripped off, TBH, because when I bought this guitar, I paid for guitar center to do a setup. Given what I found, I have to wonder if they did anything other than change the strings and tune it.

So, according to most advice I read, the next thing I did was check the action. While it looked like it was technically to Gibson’s usual spec for leaving the factory, I kinda felt like it was a bit high. This became really obvious to me awhile back when trying string bends with my instructor. I had a HUGE problem with my fingers sliding beneath the strings and catching on them. I have largish hands and long fingers, but my fingers are NOT thick and meaty. So I dropped the bridge height a bit. Not really to what it seems most call “low” action, but significantly lower than it was. Tuned it back up and tried some bends and my fingertips pushed the adjacent strings aside as they’re supposed to. GREAT! Also no buzzing. Maybe I could go lower?

While I was at it, I made some adjustments to intonation since I was fiddling with everything else.

Next step was checking pickup height. I consulted some videos on this one, since again, I had never done this before.

I found this one to be helpful.

How to Set Humbucker Pickup Height

But wait, what’s that he says in there about setting the polepiece heights?

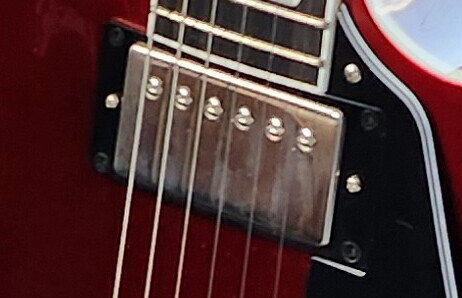
So on my guitar, it’s like someone with OCD set the polepiece heights. Both pickups looked like this. Screwdriver slots on the polepieces lined up horizontally on both pickups.

So now I go to digging to find that video about humbucker polepiece heights.

Again, the same folks made a very informative video.

How to set Humbucker Polepiece Screw Height

So I went ahead and adjusted the polepiece heights according to their suggestions in the video. Which meant I also needed to readjust the pickup heights to account for it. I think this is what changed the tone. Before, I thought my guitar sounded maybe a touch muddy or too bassy.

After finishing these adjustments, I plugged it in to play and I’d definitely say that the pickups sound a little bit hotter, but they’re also more articulate. Overall my electric sounds better, I’d say.

6 Likes

Stew mac has a bunch of great videos on set ups. I know their tools are bucks but the videos are awesome.

Edit great job doing your own work. I do mine. Its the best thing not having to pay someone else to do the basics for you. Same with mt bikes and snowboards.

2 Likes

Hey Nate,

Sounds like you’ve been having alot of fun, and learning some stuff.
Relief > Action > PU Height is the right workflow.
( Pole piece height is neither here nor there in my experience).

The final, and perhaps most critical step is to check intonation, which should be the very last thing you do.

Cheers, Shane

3 Likes

While you are in “learning mode”, another step in a setup is setting the nut slot depth. It’s very simple to test and no tools are needed (just your finger tips ;-). Change slot depth is a bit more involved.

Here a description from the luthiers’ luthier Frank Ford:

As a side note, Frank Ford, through his website Frets.com, has been sharing tips and wisdom since the last century - years before YouTube was even started (and his website looks it). Sadly, he passed away a few years ago.

3 Likes

Frank Ford obit if anyone is interested:

2 Likes

Thanks for that link. That has some great old school information. some of that old wood worker information is gold. It was nice seeing the information on Shellac. I know its rarely used in guitar these days but I come from a family of wood workers. When I was visiting that side ofnthe family, I saw it put to use plenty. My grandfather and uncle loved that stuff.

1 Like

I’ve never seen anyone else mention pole piece height, but I HAVE always wondered why it was adjustable. The reasoning given in the video seems sound to me, at least.

My guitar does sound a little nicer now. Is it a placebo? shrug

That’s a good resource. According to that, my nut height is about right. There’s such a tiny gap between the string and the first fret that I can’t even see it. But if I press down on the string at the first fret, it has some space to move and it taps the fret. It probably couldn’t get any lower without hitting that first fret outright.

1 Like

I played around with them a fair bit some time back. All sorts of theories and opinions online. In the end, from my experience, I dont believe messing with them made any real noticeable difference.

Now I just set them to match the fretboard radius, just like my saddle heights, and then leave them be.

Cheers, Shane

Cheers, Shane

Yeah, that’s basically what the video says to do, with a touch more info.

He’s saying to start with the polepiece screws all flush with the cover and to raise the middle 4 above that to follow the fretboard radius. So when you set the pickup height based on high e and low E, the slug bobbin is brought up closer to the strings than if the polepieces are all sticking up above the cover (and you set pickup height off of that).

How much of the improved sound is due to raising the slug bobbin and how much is directly related to setting the polepiece screw heights to follow the radius of the fretboard? Couldn’t tell you because for me, both of those things happened at the same time.

Taking everything together, though, my guitar plays better (no buzz, lower action that addresses an issue I had with string bending) AND it sounds better. I’ll take it.

With the bike analogy mentioned above, I absolutely get it. Because I tend to service my own bikes, outside from doing stuff that requires expensive single-use tools (suspension work more detailed than fresh seals and fluids, frame prep involving cutting tools). My last bike, I built from a pile of parts, including the wheels. Because I did it all myself and time was no concern, I addressed tiny details that most shops won’t bother to do. And my setup is more precise and reliable for it.

4 Likes

I agree with your relatives about shellac. It’s a beautiful wood finish as well as one of the best primers. It may not be used in mass produced guitars, but I used shellac to finish an acoustic guitar I built.

It’s also very safe. The shellac solvent is the same type of alcohol (ethanol), that is used in mixed drinks. So you can’t used it as a bar top finish!

Tidbit #2 - it is made from the excretions of an insect in Southeast Asia. So you can say it is “all natural”.

4 Likes