Line6 PodGo - Pros and cons

I have quite a lot of experience with the Line6 Helix product family, and when the discussion pops up around here I often recommend the PodGo as one of the best mid-priced multi-fx units. I promised @TheMadman_tobyjenner to go into a bit more details on my thoughts, especially how it compares to the other products in the line up.

I might split this into a couple of posts, because I think it will both be a bit of “review” mixed with a bit of “starting tips”.

So, as of right now, I believe there are the following variations of the “Helix” modelling platform;
Helix Floor, Helix LT, HX Effects, HX Stomp, HX Stomp XL, Helix Native… and the (strangely named) PodGo.

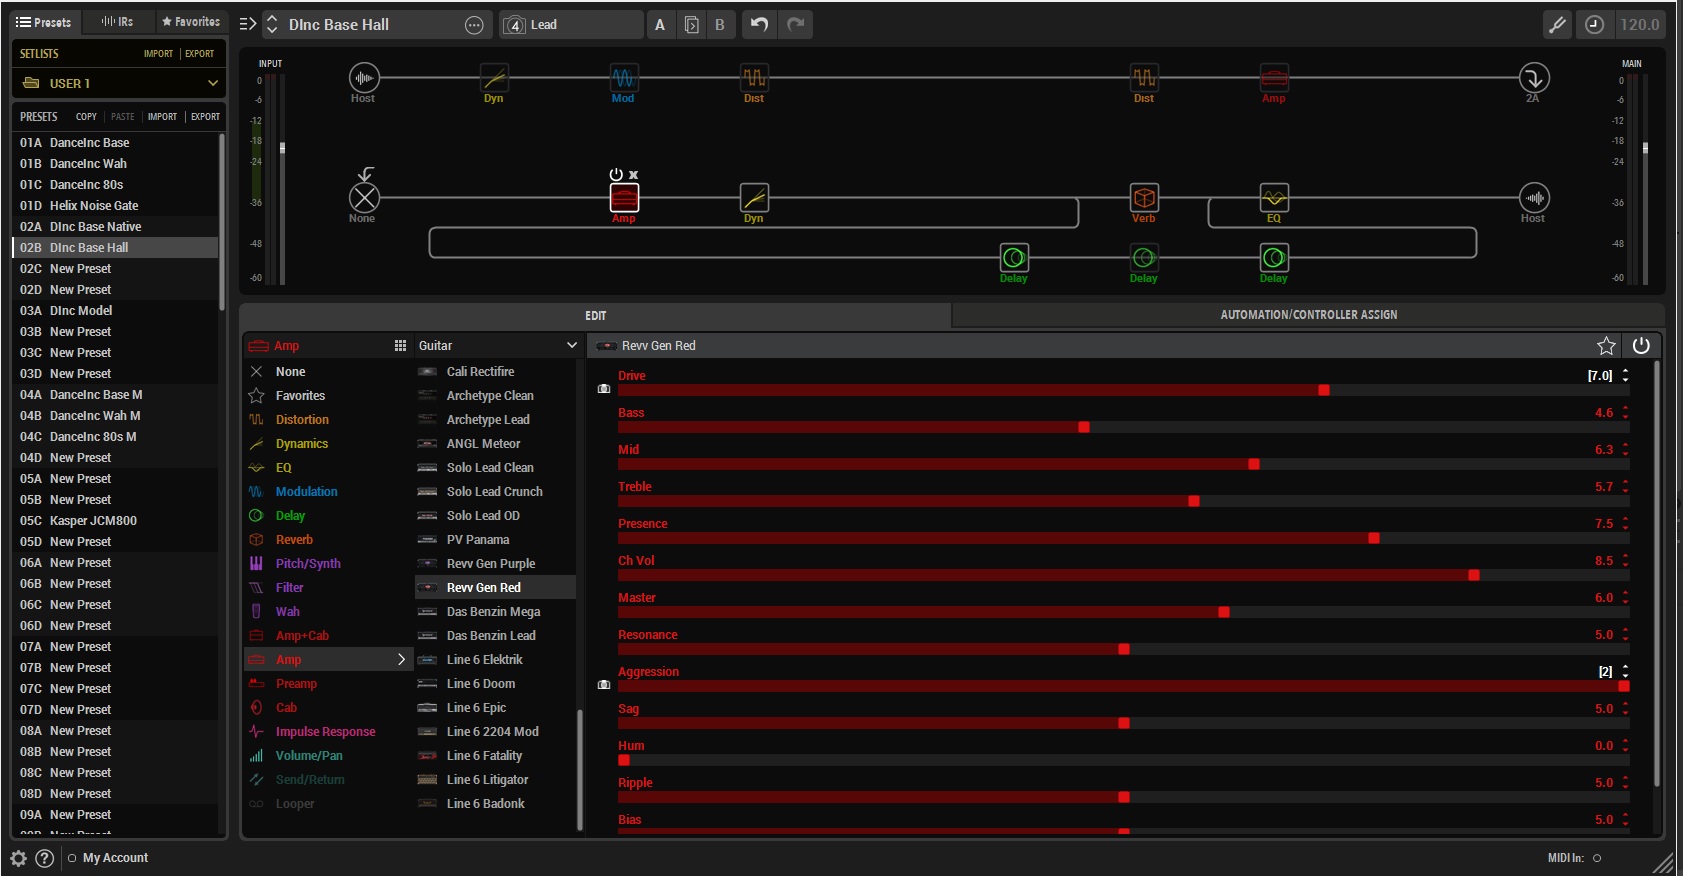
So no wonder it can be confusing (and hard) to choose the right one to get. But all of these units operates from the same basic principle; you build up a signal path, starting from a guitar input and ending at a final mono/stereo output, by connecting “blocks” together in a string. A block can then be anything from an overdrive pedal to an amp model or an effect like reverb or delay. Each block has a set of parameters to allow the user to tweak the sound, much like a real amp or a physical stomp box.

It is however super important to understand that all the hardware (and software) variations of the Helix sounds exactly the same, when using the same blocks and settings! And, for the most part (HX Effects is special, but let’s ignore that for now), it is the same set of blocks that are available on all of the units. The differences between the variations are instead these;

  • Processing power (DSP power) - how many blocks can the hardware handle at the same time within a single preset
  • Flexibility in routing - are you limited to “just” a single linear path, or can you set up things like dual-amps or parallel effects routing etc…
  • Physical interface - how many buttons and expression pedals is on the hardware. Does it come with the (very cool) “Scribble Strip” tech?
  • IO - does it have midi, XLR, how many effects loops, support for additional expression pedals etc etc. Can it do amp channel switching (perhaps important, if you want to run it 4cm with a real amp)

I know I’m repeating myself here, but I want to make it absolutely clear;

If you just want to set up something like a Fender Twin model, perhaps with an OD in front and some nice reverb/delay in the (virtual) amp loop… then that preset will really sound exactly the same on all the units! You don’t get any sound quality benefit from buying the big flagship unit.

So this is the reason why I tend to recommend the PodGo specifically. I think it has the best overall set of physical features (buttons and an expression pedal) compared to the price.

HOWEVER - in the following posts I’ll try to show exactly where its limitations are… and there are some limitations, and enough of them that I would not be 100% satisfied with it as my main unit for playing with a band.

Before doing that though, I’ll quickly describe a cool feature called “Snapshots” that the Helix platform has (in an upcoming post…)

5 Likes

Kasper

Appreciate the time and effort that is likely to go into this and subsequent sub-topics. I was just about to sit down and start reading the Owner’s Manual and get a feel for the product before it arrives, when I saw the post and came here first. I obviously took in quite a few reviews over the weekend but feel a “real” end user perspective will be invaluable.
Thanks in advance.

Cheers

Toby
:sunglasses:

2 Likes

So “Snapshots”…

In another topic @TheMadman_tobyjenner mentioned a common problem with presets and multi-fx units. Say you have a favorite “core tone” that you’ve dialed in, with an amp an OD pedal and perhaps a certain reverb setting…

But now you want variations on this tone; one with delay for playing solos, one with a wah-wah pedal, etc etc.

You could of course copy your core tone preset to two new slots on the unit, and add the delay and wah - but when you then later discover a new and better tweak of the reverb or amp… then you have to remember to update ALL those copies of the preset. That really is super annoying!

Another problem, which you may or may not find important, is that usually a multi-fx unit cannot load an entirely new preset without the sound dropping out for the briefest moment. So if you, for example, was on some distorted rhythm tone, have a chord ringing, and want to go smoothly into a solo tone - you might not be able to do that without hearing a small “stutter” in the output.

In the Helix products they have a very cool and (IMO) elegant solution to that called “Snapshots”.
Within each preset you can set up 4 or 8 (depending on hardware model) variations of the tone. Each variation - or snapshot - can have it’s own value for any settings you choose on the blocks used in the preset (ex: amp gain, delay time, delay mix etc etc) and it can also turn on/off blocks. But it can NOT add/exchange blocks to something else.

I think the Line6 guys themselves describe it something like this; imagine you have a big traditional pedal board… and an army or pixies ready to instantly help you tweak the knobs or turn things on/off. I don’t know if that description is helpful or not in understanding what it is :wink:

But bottom line is; if you can manage to build a preset that contains ALL the blocks you think you will need for all your tones… then it is indeed a fantastic way of both avoiding sound drop-outs when changing tone (because you’re not loading a new DSP program, only changing some values/settings on the existing). You can configure the buttons on the Helix hardware to switch snapshots in the current preset, rather than loading a new preset.

It also solves the problem of having the same tweaks of an amp block or delay effect in multiple presets… if you tweak some core value, which is NOT marked for “per preset value” by you, then it takes effects in all your tones. For example, reverb time or something like that…

I use snapshots extensively. When playing a live show (with the Helix Floor) I stay on the same preset the entire night, but have 6 snapshots set up to cover the tones I need.

The PodGo also have support for snapshots, BUT some of its other limitations makes them a tiny bit less useful there. But more on that in a later post (probably tomorrow) when I will start compating my way of setting up presets on the Helix Floor and the PodGo…

3 Likes

Kasper, this is priceless but I must go back to the manual ! :wink:

1 Like

So my main rig consists of the Helix Floor. I eventually picked that version because I actually do need more footswitches than what the smaller units provides (I want easy access to my 6 main tones, laid out in front of me at all times with no “page switching” needed) and, as it turns out, I actually also do need the additional processing power. Also my main setup is with a real tube head, running it in 4cm, so I needed a Helix version that had the capabilities of switching amp channel.

The PodGo cannot switch amp channel - neither through midi out or through a 1/4" jack. It can be used in a 4cm setup, as long as what you use is a single-channel amp (or if you’re ok with manually switching amp channel through a separate footswitch). But for this reason I solely use the PodGo for pure modelling tones, and therefore I’ll also compare it to my pure modelling preset on the big Helix.

I’ll first, in broad strokes, describe my preset/requirements from the big Helix, and then go on to explain how close I can get to that with the PodGo. My Helix Floor is currently at our rehearsal room, so I cannot show a screenshot from the real PC editor for that one… but I’ll show the preset in Helix Native, which looks almost the same. The signal path/routing is the exact same at least, so it’ll do fine.

As I said in my previous post, I heavily rely on snapshots within a single “master” preset. So within a single preset I need the following 4 main tones; “Clean”, “Crunch” (light distortion, “Drive” (more heavy rhythm) and “Lead”.
My preset for that looks like this;

Let me briefly explain; The big Helix has 2 CPU cores, each core (1 and 2) can run two 'paths" called A and B.
The signal starts at the circle labeled “Host” (it would be “Guitar In” on the hardware). It then follows the top most line, through a bunch of blocks, before I’m routing it to core number 2, signal path “A”. Core 2 runs a couple of blocks before I split it out into some parallel processing of reverb and delay. This is a trick I like to use. By running delay and reverb in parallel (instead of putting reverb after delay, which is common on a pedal board) I get the delays to be much clearer, because only the “core amp tone” gets reverb applied, not each delay repeat. When the paths merge back together I can then mix how much of each signal I want in the final output.

You can also see I use two amp head blocks. This is because in the Helix world an amp model is always single channel. If they provide models for, for example, both the purple and red channel of a Revv amp… then they’ll do that by giving you two amp blocks. And as you can perhaps recall, using snapshots you can NOT add/change a block… but you CAN enable/disable them. So in this setup the first amp block is a “Fender Deluxe Vib” amp model, which I use for clean and crunch tones, and the second amp block is a “Revv Generator Red” which I use for more heavy stuff and Leads. The snapshots are set up such that only ONE of the amps is enabled at the same time.

Going over the total signal chain then;
Guitar input (which has a noise gate built in) → Compressor → Chorus → OD1 → OD2 → Fender Amp → Revv Amp → 2nd Noise gate → (split) reverb/delay setup → Final EQ → Out…

And, again, using snapshots I control which of these blocks are active at the same time and how the parameters are set.

In the screenshot I’ve selected the Revv amp head, and you can see it’s parameters below. Those parameters with a small camera icon, and where the value is in square brackets, are parameters I’ve set up for per-snapshot values… all the rest are global to the preset and the same in all tones.

Ok, so I bought the PodGo to get as close as possible to the above… so I can now finally begin to describe how close I got :wink:

3 Likes

Great stuff already; changed category and pinned it right away!

4 Likes

The PodGo has a quite different approach to how much flexibility it gives the user. I think it’s intended to be as easy as possible to use, while still providing great tones.

Instead of giving you a completely blank signal path, all PodGo presets comes with 6 “block types” which must be there (you can turn them off if you want though) and then only 4 empty blocks per preset, which you can use for whatever you want… as long as there is enough processing power left!

The 6 “must have” blocks are these: Volume pedal, Wah Pedal, amp head model, cabinet model, effects loop and an EQ pedal. You can change the type of each block (pick a different EQ pedal model, or a different amp or cab)… and you can also drag the blocks around on the signal chain to place them whereever you want. An empty preset in the PC editor looks like this:

Ok, so let’s talk some limitations already now…

The PodGo supports 4 snapshots per preset - but it cannot have two amp models at the same time… so, for my use case, it was not possible to mirror the idea of a single preset with snapshots. So I went for the traditional multi-fx approach with having different presets for my tones. Then I’ll have to “live with” a small stutter when changing tone, and maintain common parameters across presets. A bummer, but in my case OK, since this is a backup unit that I expect to program once, and then leave as it is…

It also does not support parallel processing - so I cannot do my ideal reverb/delay setup. BUT, I can easily “live with” the traditional “delay into reverb” setup, just tweaking the values slightly differently.
I also cannot have my “dual delay” setup for my solo patch, but again this is OK… I just pick the one delay I like the best and tweak from there.

My Lead preset then looks like this:

You can see I dragged things around a bit - for example, I always want my volume pedal after the amp, but before reverb/delay. That way it does not affect gain level (I use guitar volume for that)… and when I roll down volume at the end of a song, any remaining delay/reverb repeats will still ring out.

But the good part - otherwise the PodGo gives me the exact same blocks as I use on the Big Helix. And my Lead patch sounds 95% the same (only the previously described differences with delay/reverb). But the PodGo really sounds just great!

Now for the last, but (perhaps) important limitation;

When setting up my “Wet 80s clean tone” (that classic “glassy” clean 80s tone with tons of chorus, delay and reverb) I actually ran into problems. The PodGo did not have enough processing power in its CPU to do that kind of thing, using the blocks I was using on the big one.

That tone has a signal like this:

Guitar → Compressor → Fender clean amp → Chorus → Delay → Reverb → EQ → Out

So it doesn’t sound THAT complicated, right?

But I normally use a “Deluxe Comp” compressor block, a “Trinity Chorus” block, the latest “Dynamic Hall” reverb block and a “Transistor Tape delay” block. I picked those on the big Helix because those sounded the best… gave me that “expensive rack” 80s tone…

However, these specific blocks are apparently quite CPU intensive… so the PodGo could not run them at the same time! I eventually had to compromise and use a simpler compressor and a much simpler reverb block.

So just something to be aware of - it’s not just a theoretical discussion, running out of processing power. It really can happen, even with a quite standard signal chain like this one. Not a deal breaker, since it still sounds pretty great with the replacement blocks, but something to be aware of… you may have to prioritize and optimize certain tones you want to set up…

3 Likes

Ok, final post…

To summarize the pros/cons as I see them:

  • Great price for a great hardware layout with some great tones possible
  • Not the ideal choice if you want to use it with a channel switching real amp
  • Not the ideal choice if you want the most advanced/flexible signal routing
  • Very quick and easy to set up great tones, if your needs are a bit more basic/traditional (not meant in a negative way)
  • Be aware that you may actually run out of processing power, when using the best models in each block
  • Very lightweight, has headphones out… easy to bring with you in a backpack
  • No XLR output, only 1/4"

Still gets my seal of approval as a really great multi-fx for most hobbyist players!

3 Likes

@TheMadman_tobyjenner, @Kasper-
Why do you guys do this to us?
I was really happy with my li’l amp, having discovered what the reverb, delay and gain knobs do… :roll_eyes:
Shame on you!

3 Likes

Next month I’ll have to figure out how my looper actually works (maybe)…
But if ever…I will definitely read this with great interest,…thanks in advance for this
Greetings

Edit: I see you had the same thought @brianlarsen :laughing:

4 Likes

Sorry to be fanning the flames of any GAS :smiling_imp: But as long as you guys are happy with what you have, then you (probably) don’t need anything new, right? :wink:

I forgot to mention;
The “cab” blocks on the PodGo is pretty good, but (IMO) the tones takes a big step up if you use a 3rd party IR file with it. In my case I’m a fan of the Celestion IRs, so I’ve uploaded a couple of the best ones to the PodGo (drag and drop a file in the PC editor) and then change the cab block to “Impulse Response”.

Also I should perhaps link a few example of the tones. Now, as I mentioned - I use the Helix modelling tones for 95% of my home practice sessions. And it was also this exact Lead patch I showed above that I used for those couple of quick iPhone camera clips I have previously posted with some solos. I’ll link them again, although they do not really give the PodGo the full justice it deserves. It would sound a lot better in a real recording into a DAW (and my bends would also, perhaps, be more accurate :rofl:). But still, even on my iPhone “in the room” tone I think the Helix modelling tones sounds great. Good enough that I’m happy practicing with them at least :slight_smile:

2 Likes

You know what to do when you get an itch ! :wink:

:smiling_imp: “Haha, GAK can deliver one tomorrow for £359.”

:angel: “Listen to me: Do not go into the light Stop where you are. Turn away from it.

2 Likes

I see I have more reading to do !! Thank you.

Now I have looked at the manual and seen the range of amps and cabs I am even more impressed, compared to the Mustang (17 amps 12 cabs) but happy to see some old favourites and looking forward to see how they compare, especially the 57 Champ.

IR use noted and the nod to Celestion. I’ll be hanging back on that route for a while. From what I see learning and applying snapshots will be the first challenge. The rest looks pretty straight forward.

Great audio share, don’t care how many times you drop those in here ! Love that Elmore James signature lick btw and on my to learn list !! Ordered some TRS cables today, so I can plumb it into either AIs if I am doing a playing/singing “gig”.

Can’t wait until Friday, I’ll be standing at the end of the drive waiting for UPS !

:sunglasses:

2 Likes

Well for my intended use it ticks all the boxes. The limitation apart from possible CPU overload, will not hinder my use. Great write up and comparison.

:sunglasses:

2 Likes

Glad to hear it, and I thought it would. Enjoy!
And, of course, just ask if you have any questions when you get it :slight_smile:

2 Likes

@Kasper
Kasper, thanks for taking time to share and educate all of us, not just @TheMadman_tobyjenner. I may never get one but that took nothing away from reading all about it plus the added bonus of another listen to the two clips.

2 Likes